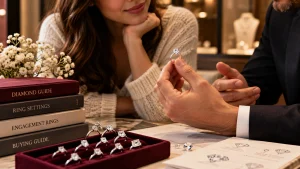
Designing a custom engagement ring gives you the freedom to create something around a specific person rather than choosing from a finished selection. You can decide on the center stone, setting, metal, band shape, proportions, and personal details, then refine the design before it is made.
That freedom is exciting, but it can also make the process feel overwhelming. There are dozens of possible combinations, and some decisions affect others. The diamond shape influences the setting. The setting affects the band profile. The band profile can affect how the ring sits next to a wedding band.
The easiest way to design a custom engagement ring is to make the decisions in the right order.
What Does a Custom Engagement Ring Mean?
A custom engagement ring can range from a modified existing design to a completely bespoke ring created from scratch.
You might:
- Change the center stone in an existing design
- Combine a particular setting with a different diamond shape
- Change the metal or band style
- Add engraving or hidden details
- Create an entirely new setting around a specific stone
The more elements you customize, the more important the design and approval stages become.
A custom ring should not simply look different for the sake of being different. The best designs combine personal meaning, attractive proportions, durability, and practical everyday wear.
1. Start With Your Budget, Lifestyle, and Inspiration
Before choosing a diamond or sketching a setting, establish three things: budget, lifestyle, and design direction.
Set a realistic budget
A custom ring can be designed around many different budgets, but having a clear limit helps you decide where to spend and where to compromise.
For example, you may decide that the center stone matters most and keep the setting relatively simple. Someone else may prefer a smaller center stone with more intricate metalwork.
Your budget should account for the complete ring rather than only the diamond. Consider:
- Center stone
- Side stones
- Setting and metal
- Custom design work
- Engraving
- Labor and craftsmanship
- Shipping or delivery
- Potential resizing or future modifications
If you are considering a lab-grown diamond, you can also compare different stone sizes and qualities before committing to the setting.
Think about how the ring will be worn
A beautiful design still needs to work for everyday life.
Someone who works with their hands or regularly participates in sports may prefer a lower-profile or more protective setting. Someone who rarely puts their hands through demanding activities may have more flexibility with delicate details.
Think about:
- How active the wearer is
- Whether the ring will be worn every day
- How often it may encounter water, tools, or rough surfaces
- Whether the wearer prefers a low or high profile
- Whether they already wear other rings
This can narrow down the design before you become attached to a style that may not be practical.
Build an inspiration folder
Save photographs of rings you like, even if you do not know exactly what you like about them.
Look for patterns.
Maybe you repeatedly save oval diamonds, yellow gold bands, delicate pavé, and vintage details. Or perhaps nearly every ring you like has clean lines and a low-profile setting.
Reference images are particularly useful during a custom consultation because they communicate proportions and design preferences more clearly than descriptions alone.
2. Choose the Center Stone
The center stone is usually the visual starting point for the rest of the ring.
If you are choosing a diamond, consider both its shape and its quality characteristics.
Round, oval, emerald, pear, cushion, marquise, radiant, and other shapes can produce very different looks even at the same carat weight.
For a broader introduction, see the diamond shape guide and 4Cs of diamond quality guide.
Choose the shape based on the overall design
Do not choose a diamond shape in isolation.
Ask how the stone will interact with the setting.
A long oval may suit a design intended to create an elongated appearance. A round diamond can work naturally with classic solitaire and halo designs. An emerald cut can create a more architectural appearance, while a pear or marquise can give the ring a more directional silhouette.
The setting should be designed around the actual dimensions of the stone, not just its name.
Decide between natural and lab-grown
If you are considering a diamond, decide whether you want a natural or lab-grown stone before finalizing the design.
Both can be incorporated into custom engagement rings, but your choice can affect how you allocate the budget.
If you want to explore the differences before designing the ring, compare lab-grown vs. natural diamonds.
Think beyond carat weight
Carat weight should not be the only specification you consider.
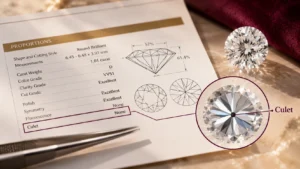
Cut quality, color, clarity, proportions, and the diamond’s actual appearance all matter.
Two diamonds with the same carat weight can look noticeably different because of their proportions and face-up dimensions.
For a custom ring, this is particularly important because the setting will be made to fit the stone you select.
3. Choose the Ring Setting
Once you have a direction for the center stone, decide how you want it held and surrounded.
Some popular options include:
- Solitaire
- Halo
- Hidden halo
- Three-stone
- Two-stone
- Bezel
- Pavé
- Cathedral
- Cluster
- Vintage-inspired settings
You can also combine features to create something less conventional.
For example, you could pair a solitaire center stone with a sculptural band, add a hidden halo beneath the center stone, or combine vintage-inspired details with a modern profile.
If you are unsure which setting works best, the engagement ring setting guide can help narrow down the options.
You can also compare different setting ideas in the diamond shape and ring setting guide.
Consider security as well as appearance
The setting needs to hold the stone securely.
Prongs leave more of the diamond visible and can create a classic appearance. A bezel surrounds the edge of the stone with metal and can provide a more enclosed design.
If you choose prongs, consider their number, shape, placement, and how they interact with the diamond.
The engagement ring prong guide is useful when deciding how the center stone should be secured.
4. Select the Metal
Your metal choice affects the ring’s color, appearance, durability, and overall character.
Common options include:
- Yellow gold
- White gold
- Rose gold
- Platinum
Think about the jewelry the wearer already owns. If most of their jewelry is yellow gold, a yellow-gold custom ring may feel more cohesive. If they prefer a bright white-metal appearance, white gold or platinum may be a better direction.
You can compare options in the engagement ring metal guide.
You can also explore white gold vs. platinum, rose gold vs. yellow gold, or platinum vs. gold if you are deciding between specific metals.
The metal should also work with the design. A delicate vintage ring, a minimalist solitaire, and a sculptural statement ring may each benefit from different metal choices.
5. Decide on the Band Shape and Proportions
This is one of the easiest parts of a custom design to overlook.
The band is not just a strip of metal supporting the center stone. Its width, thickness, profile, shoulders, and shape all contribute to the final appearance.
Consider:
Band width
A very thin band can make a center stone appear more prominent, but it may not be appropriate for every design or lifestyle.
A wider band can create a stronger visual presence and may be more appropriate for certain detailed designs.
Band profile
Decide whether you want the ring to sit low, medium, or high on the finger.
A higher center stone can create more visual height but may interact differently with clothing and everyday activities.
A lower-profile design can feel more streamlined and practical.
Band shape
You can keep the band straight and traditional or introduce details such as:
- Knife-edge shoulders
- Twisted metal
- Split shanks
- Bypass elements
- Sculptural curves
- Tapered shoulders
The sitemap includes dedicated collections for styles such as twisted engagement rings, split-shank engagement rings, knife-edge engagement rings, and sculptural engagement rings, which can be useful for visual inspiration.
6. Decide How the Ring Should Look From the Side
Do not design the ring only from a top-down perspective.
The side profile can completely change how the finished ring feels.
Look at:
- Center stone height
- Gallery rail
- Prong structure
- Undergallery details
- Band thickness
- How the wedding band will sit underneath the engagement ring
This is especially important if you want a distinctive setting.
A ring can look beautiful in a front-facing photograph but feel too tall or impractical once you see the side profile.
When reviewing the design, always ask to see it from multiple angles.
7. Plan the Personal Details
This is where custom design can become genuinely personal.
You might add:
- Engraving
- A hidden gemstone
- A meaningful symbol
- Initials
- A special date
- A birthstone
- A hidden design element
- A distinctive gallery
- A motif inspired by nature or architecture
The important thing is restraint.
Not every meaningful detail needs to be visible from across the room. A small engraving or hidden feature can make the ring personal without making the design visually busy.
If you prefer a nature-inspired look, for example, the sitemap includes floral engagement rings and leaf-inspired engagement rings.
8. Think About the Wedding Band Before Finalizing the Design
One common mistake is designing the engagement ring without considering what will eventually sit beside it.
Ask:
Will the wedding band sit flush against the engagement ring?
If the center stone or setting extends low over the finger, a straight wedding band may not fit underneath it.
You may instead need:
- A curved band
- A contoured band
- A slightly higher setting
- A wedding band designed specifically around the engagement ring
This is much easier to solve during the design stage than after the engagement ring has already been made.
9. Review the CAD Design Carefully
Once your concept is established, the jeweler may create a CAD, or computer-aided design, model.
This gives you a detailed three-dimensional representation of the proposed ring before production.
Treat this stage seriously.
Look at the design from:
- Top
- Bottom
- Front
- Back
- Left side
- Right side
Pay particular attention to:
- Center stone proportions
- Band width
- Stone height
- Prong placement
- Gallery construction
- Side stones
- Metal thickness
- Wedding-band clearance
- Engraving placement
CAD is also the stage where changes are generally easier to make than after production has started. Current custom-design processes commonly use CAD or similar 3D visualization before casting or fabrication.
Do not approve the design simply because the rendering looks attractive.
Approve it because the proportions, construction, and details make sense.
10. Ask About a Wax or Resin Model
Some custom jewelers also provide a physical wax or resin model before casting.
This can help you understand the ring’s actual size and proportions in a way that a screen cannot.
If a physical model is available, examine:
- How wide the band feels
- How high the center stone sits
- Whether the proportions feel balanced
- How the ring feels on the finger
- Whether the setting catches on clothing
- Whether the wedding band can sit comfortably beside it
Not every jeweler uses the same production process, so ask what type of preview is available before production begins.
11. Approve the Materials and Production Details
Before giving final approval, make sure the specifications are written down correctly.
Confirm:
- Diamond or gemstone
- Shape
- Carat weight
- Cut
- Color
- Clarity
- Metal type
- Ring size
- Band width
- Setting style
- Side stones
- Engraving
- Expected completion date
If you are supplying your own stone, make sure the jeweler has evaluated its exact dimensions and designed the setting around it.
Also ask about the jeweler’s policies for:
- Resizing
- Repairs
- Warranty coverage
- Maintenance
- Returns or cancellations
- Changes after approval
Custom work can have different policies from ready-made jewelry, so it is better to understand these details before production starts.
12. Leave Enough Time for the Process
Do not wait until a few weeks before your proposal date to begin a complicated custom project.
The exact timeline varies considerably depending on the design, stone availability, number of revisions, and jeweler. Current custom-ring guides commonly describe processes lasting several weeks from design approval through production, with more complex projects taking longer.
Give yourself additional time for unexpected changes.
A sensible approach is to have the design substantially finalized well before the proposal date rather than relying on the shortest quoted production time.
For more detail, see how long a custom engagement ring takes.
Common Mistakes to Avoid When Designing a Custom Engagement Ring
1. Choosing the diamond before thinking about the design
The diamond and setting need to work together. A stone that looks perfect by itself may not suit the setting you eventually want.
2. Focusing only on the top view
The side profile, height, gallery, and band construction are just as important.
3. Making the design too complicated
Adding more details does not automatically make a ring more personal. Too many competing elements can make the design feel visually crowded.
4. Ignoring the wearer’s lifestyle
A delicate design may not be the best match for someone who works with their hands every day.
5. Forgetting the wedding band
Make sure you know how the future wedding band will interact with the engagement ring.
6. Approving CAD too quickly
The CAD stage is your opportunity to catch proportion and construction problems before production. Take the time to inspect every angle.
7. Leaving too little time
Custom work involves more decisions and production stages than simply purchasing an in-stock ring. Build in a buffer.
8. Treating carat weight as the only diamond priority
The biggest diamond is not necessarily the best-looking diamond. Cut quality, proportions, shape, color, clarity, and overall appearance all deserve consideration.
Custom Engagement Ring Design Checklist
Before approving your ring, make sure you can answer yes to these questions:
- The design matches the wearer’s personal style.
- The center stone is suitable for the setting.
- The diamond or gemstone specifications are correct.
- The metal matches the desired appearance and lifestyle.
- The band width and thickness feel appropriate.
- The center stone height is comfortable.
- The ring works with a future wedding band.
- The prongs or other setting structure are appropriate.
- Personal details are intentional rather than excessive.
- The CAD design has been reviewed from multiple angles.
- Any available wax or resin model has been checked.
- The ring size has been confirmed.
- The production timeline leaves enough room before the proposal.
- Warranty, resizing, repair, and other policies are understood.
Frequently Asked Questions
Is designing a custom engagement ring difficult?
It can seem complicated at first, but the process becomes much easier when you make decisions in sequence. Start with budget and lifestyle, then choose the center stone, setting, metal, proportions, and personal details before approving the final design.
Can I design a custom ring around a diamond I already own?
Yes, a jeweler can often design a setting around an existing diamond or gemstone. The stone’s exact dimensions and characteristics should be evaluated before the setting is finalized.
Should I choose the diamond or setting first?
There is no universal rule. However, the center stone’s shape and dimensions directly affect the setting, so the two decisions should be made together rather than independently.
How long does a custom engagement ring take?
It varies by jeweler and design complexity. Several weeks is common, but intricate designs, stone sourcing, and revisions can extend the timeline. Start early enough to allow a buffer.
Is a custom engagement ring more expensive?
Not necessarily. A custom design can involve additional design and craftsmanship costs, but the final price depends on the stone, metal, complexity, and jeweler. A relatively simple custom setting does not automatically mean an expensive ring.
Can a custom engagement ring be redesigned later?
Some elements can be modified or repaired later, but substantial changes may require significant work. It is usually better to solve major design decisions before production begins.
Final Thoughts
The best custom engagement ring is not necessarily the most elaborate one. It is the one where the center stone, setting, metal, proportions, and personal details all make sense together.
Start with the person who will wear it. Think about their style, lifestyle, existing jewelry, and the details that have meaning to your relationship. Then turn those observations into a practical design.
Take your time with the stone and setting, inspect the ring from every angle, think about the wedding band, and use the CAD or physical-model stage to make changes before production.
When the process is approached this way, designing a custom engagement ring becomes less about creating something complicated and more about creating something that feels unmistakably right.